
PayPal’s official website, support, tools, guides—pretty much everything about PayPal apart from the actual money sending/receiving ability—are an absolute shitstorm mess. And in order to use the PayPal plugin on your WordPress website, you need to have a Business account, because the free account doesn’t support plugins.
I found literally not a single guide or post anywhere showing a method, so I came up with my own. I only had to dig deeper than digging to China to get this thing done, and this post is so you don’t have to summon your shoveling demons from Salazar and sell your soul.
Now that that’s out of the way, let’s get to it, grasshoppa.
Step 1: Make a ‘PayPal.Me’ profile
PayPal.Me is a faster, easier way to get paid through PayPal. In order to make our button, we will have to make a PayPal.Me link to direct the person clicking on the link straight to the money-sending page of your profile. Click on my donate button on the right side of this page to check out how it looks!
Go to PayPal, login into your account, and then go to the transfers page, here.
You’ll find these options (or something similar, depending on your region):
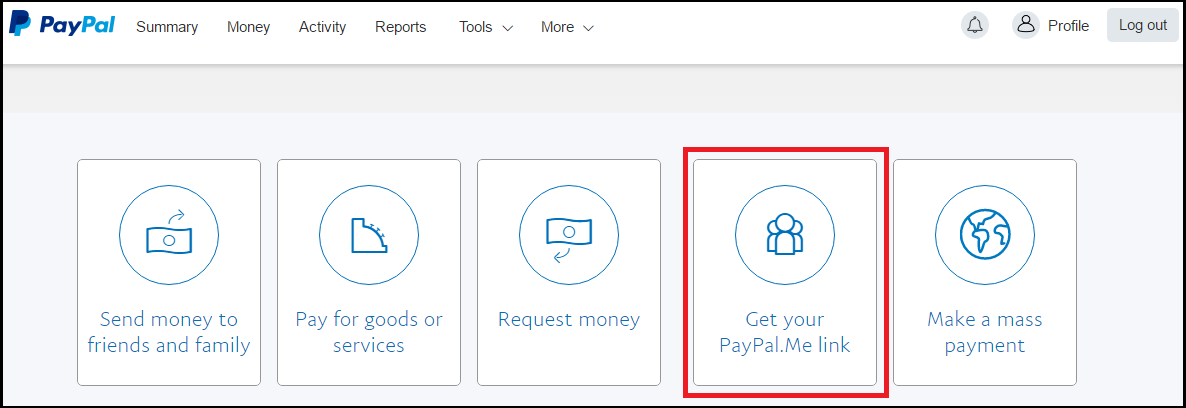
Click on “Get your PayPal.Me link” and fill the simple form. When you finish, you’ll end up with your own PayPal.Me link and profile! It should look something like this:

You have made your PayPal.Me link!
You will be given the link after you’ve made it. Be sure to copy it because we’re going to need this in the further steps.
Step 2: Design your button
You can just download any image you like from the internet, or make a custom one for your button’s appearance. I managed to make mine with a plain black background and Photoshopped the text onto it that matches the font of my blog’s banner. Make sure it’s a small image, you don’t want your PayPal “button” to be half the page itself.
Step 3: Putting the button on your blog
Head over to your WordPress website/blog and login into your account.
Head back to your WordPress website/blog and click on the “Customize” button at the bottom-right, shown here:
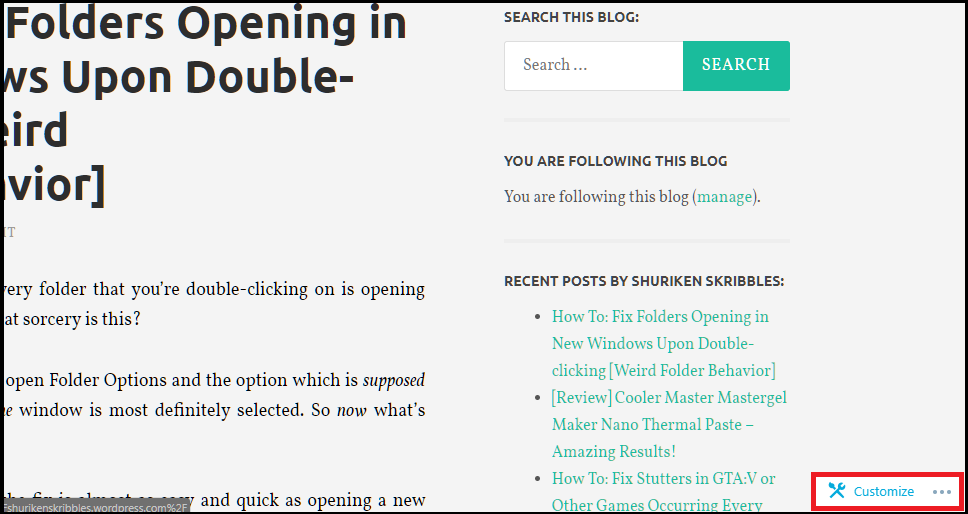
NOTE: If you cannot see the “Customize” button, scroll the page up and down a little and it will show up on its own.
This will open up your blog editing tools.
Click on the “Widgets” section, as shown below:

Then select the location where you want to place your donation button:

I have chosen the Sidebar and Footer 3 locations for my donation buttons.
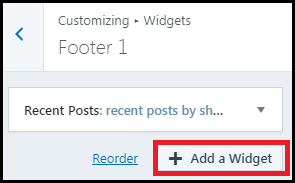
After selecting the location, click on the “Add a Widget” button, as shown below:
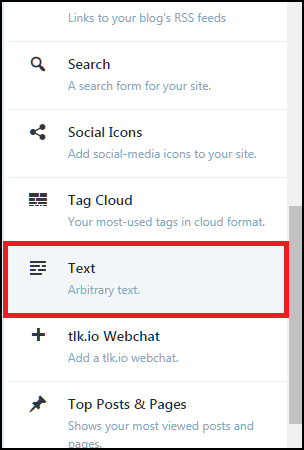
A long list of different widgets will open up. Scroll to “Text” or simply search for it in the search bar at the top of the list:
You will see a text box come up. Keep everything empty, or if you want to title your donation button, insert a suitable title in the “Title” text field. Now, click once in the main text box to put your cursor there and then click on “Add Media”, like this:

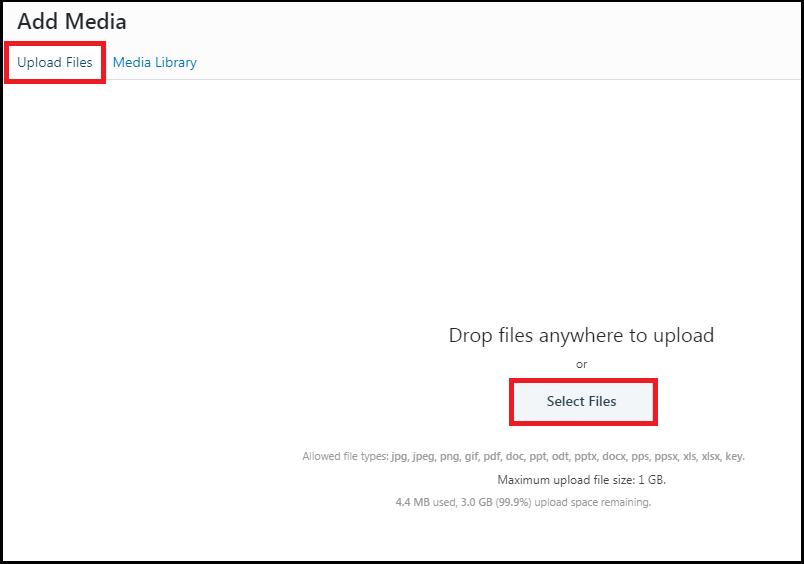
Now, you can upload your button image that you had made earlier. For this, click on “Upload Files” which is near the top-left of the screen, and then click on “Select Files” to upload your image, as shown below:
After uploading and selecting your image, click on “Insert into post” on the bottom-right:

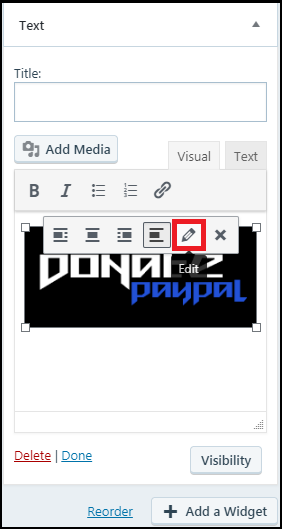
Your uploaded image will now appear in the main text box. Click on your image, and a small toolbar will appear. In that toolbar, select the “Edit” option, which has a pencil for its icon, as shown below:
This will open the image’s properties. Here’s the most important step in this entire process. Open the drop-down menu of “Link To:” and select “Custom URL”, and then in the text box below, paste the PayPal.Me link you had copied earlier after creating it. You can also change the size of the button in the “Size” menu. After you’re done, click on “Update” at the bottom-right of the screen. This entire step is shown in the image below:

Finally, click on “Publish” near the top-left of your screen:

You’re done! You have created your own PayPal donation button for your WordPress blog!
Step 4: Verify the button’s functionality
Open your website as a viewer and click on the button you just made, does it take you to your PayPal.Me profile link? If yes, congratulations. If not, then follow the steps properly again to ensure you’ve done everything right.

This is god sent thank you so much.
LikeLike
Made my day! I can finally implement this onto my blog, had been clueless
LikeLike
godly
LikeLike
This is amazing
LikeLike
dude, Thank you really this is gold
LikeLike
Cheers for a good content.
LikeLike
thank you so much for this
LikeLike
I have a small photography blog and I have been searching for a way to try and make a little money through my blog for so long but it seems that it is not possible in the free thing. Im so glad I finally found this. Such detailed and easy instructions. Bless you
LikeLike