Either all your friends have it and you don’t, or it is more complicated than that and you just reinstalled Windows after having the Dark UI update but chose an older disc image for the installation.
Whatever the reason, Windows Update isn’t automatically updating Windows to the Dark UI version for you automatically. And you are most definitely missing out on one of the biggest changes Windows has made to its UI in literally a decade. A complete overhaul.

You do not want to read any of this and most of you just scroll directly to the steps anyway. But just in case you are reading all this, here is how to get the Dark UI update. I’ve got you, homie.
Reason
The reason you are not being able to update to the Dark UI version of Windows using Windows Updates (automatic) is that it was only available for automatic updates for a brief period. With the roll out of the Dark UI update (also referred to as the ‘1809 update’ or ‘October 2018 update’), Microsoft had realized it had quite a few bugs. Especially impacting the Windows Defender aspect of Windows. Therefore, Microsoft had probably stopped this particular update from automatically installing in many systems.
But if you use a third party security tool (antivirus/antimalware), you do not have to care about Windows Defender anyway. Besides, it is pretty much useless, annoying, and yet resource consuming.
Now, Windows did stop this update from happening automatically in some systems, but has still officially allowed to manually apply the update yourself as it says here.

So, now that you know the reason, you can move towards finally getting this update done manually.
Step 1: Prepare / Disclaimer
Windows Updates—no matter how minor or substantial—are typically completely safe and reversible, and never affect user data and documents at all. But just in case, always backup all your important data, charge your laptop enough and keep it plugged in (in case you’re on a portable system) and of course, take all responsibility in advance in case you cause any issues to your system.

I hate this part of a disclaimer, but it’s necessary nowadays. Kids cry and whine otherwise.
Step 2: Download the manual Update Assistant
Download the Windows Update Assistant—which will manually download, install and update to the version 1809 (Dark UI update) from official Windows servers—from here. (Size: ~6MBs)
You’ll now have the following application downloaded:
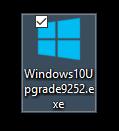
Step 3: Run the Update Assistant
Run the ‘Windows10Upgrade9252.exe’ application, and you will be presented a window that will check for updates:

After the checking completes, you will receive a prompt or few about upgrading to the latest Windows version. Once you’re ready, accept and continue. This process will take time as the entire update will be downloaded first, then installed (which may include a few automatic reboots), and then initialized for first use.
Step 4: Verify
After everything completes and Windows boots up completely and welcomes you to the first use of your brand new upgrade, click on Start and go to Settings.

Then select “Personalization”.

Now, go to the “Colors” tab and scroll to the bottom. You should see the “Dark” option under “Choose your default app mode”, as shown below:

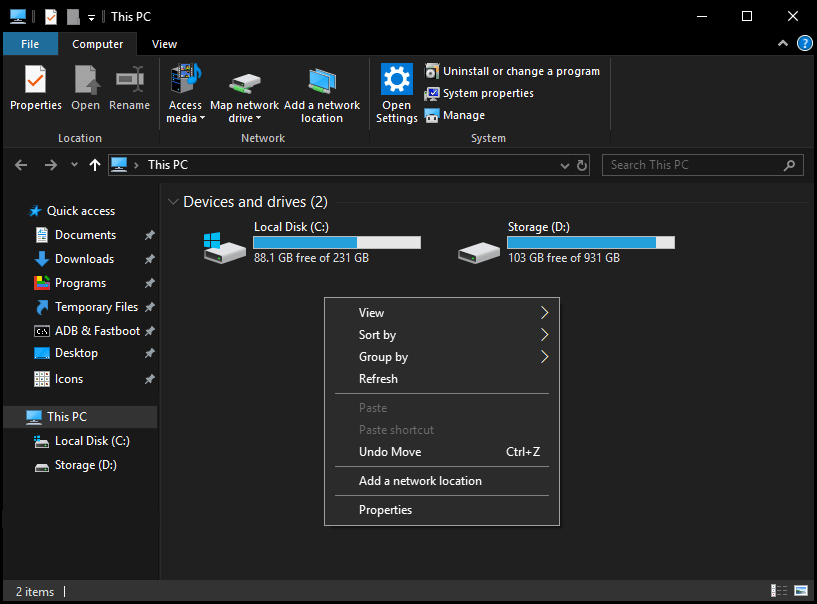
Select the “Dark” option and go to your file explorer or “This PC”, or just right-click somewhere on the desktop to open the context menu. It should look like this:
You’ve done it.
Give yourself a pat on the back, or summon a demon or something to do it for you. Because you’ve now achieved Darkness.

I like it when individuals get together and share ideas. Great site, keep it up!
LikeLike
This is the guide that finally helped me get the 1809 update hahaha
LikeLike